Time is a guide, not a rule
Use the calculator for planning only. Your brisket is done when it probes tender — not when the clock says so.


Get a precise oven brisket schedule — when to start, wrap, rest, and serve — using the 225°F or 275°F method. Works backward from your serve time.
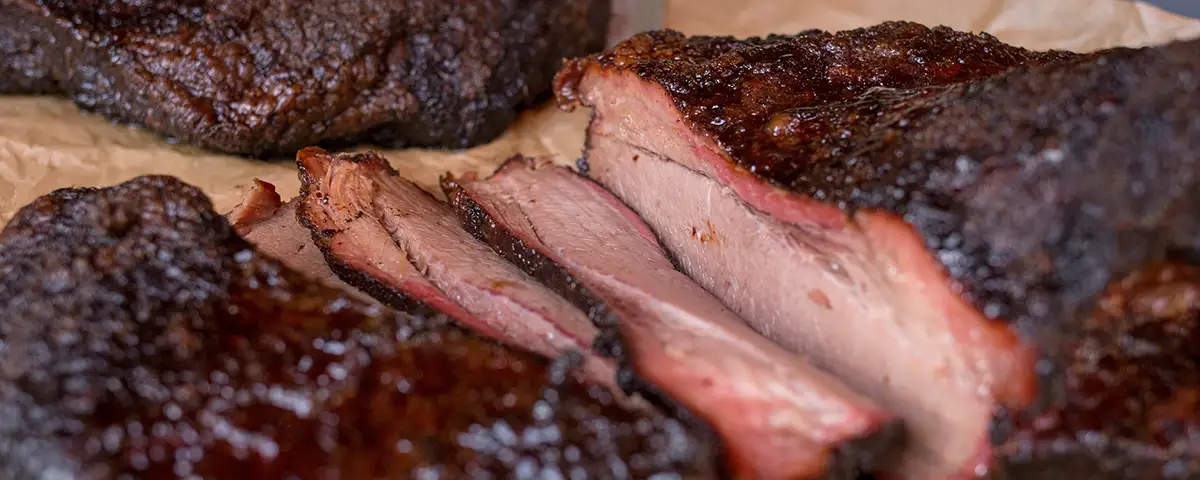
Choose a method, enter your trimmed weight, and set your serve time. Every step from fridge to table is mapped out for you.
Enter your details to generate a full cook schedule
Key reminder: Your brisket is done when it probes like soft butter — not when the timer says so. If it finishes early, wrap tightly and hold in a towel-lined cooler for up to 4–6 hours. Finishing early is always better than finishing late. Why the rest matters →
This calculator covers two oven-roasted brisket methods: a traditional 225°F low-and-slow method and a faster 275°F method that I used personally with excellent results. Both account for the full arc of a brisket cook — tempering, an uncovered phase for bark development, a wrapped phase to push through the stall, and a rest period before serving.
You input your serve time, not your start time. The calculator works backward to tell you exactly when each step happens. All estimates build in time for the rest — which is not optional.
| Method | Rate | 10 lb | 14 lb | 18 lb |
|---|---|---|---|---|
| 225°F Low & Slow | ~1.5 hrs/lb | 15 hrs | 21 hrs | 27 hrs |
| 275°F Hot & Fast | ~1.1 hrs/lb | 11 hrs | 15.4 hrs | 19.8 hrs |
All estimates include a 2.5-hour cooler rest. Times are planning guides — probe tenderness is your real signal.
Everything I learned from my own oven brisket cook. Real lessons from a real project, including the ones that surprised me most.
Brisket has a reputation as exclusively a smoker cut. But oven brisket, done right, produces extraordinarily tender and juicy results that rival low-and-slow barbecue. Brisket is a heavily worked muscle full of collagen — connective tissue that melts into gelatin with sustained, gentle heat. That gelatin is what gives great brisket its silky, pull-apart texture and rich mouthfeel. The oven's advantage is consistency: it holds a precise temperature better than most backyard smokers.
The most important mindset shift: plan backward from when you want to eat, not forward from when you start. Every variable — brisket size, oven calibration, the depth of the stall — makes precise forward timing impossible. What you can control is the endpoint. The goal is always to finish early.
The most important rule: Finishing early is always better than finishing late. A brisket holds safely in an insulated cooler for 4–6 hours with minimal quality loss — and often improves during the hold. Build this buffer into every schedule you plan.
Traditional brisket is cooked at 225°F — which can mean 20+ hours for a large packer. The 275°F method cuts that to roughly 1.1 hours per pound without sacrificing tenderness or juiciness. In my own cook, it produced excellent bark, a juicy flat, and clear results. The stall still occurred, but once wrapped, the brisket moved through it much faster. If time is a factor, 275°F is my recommendation.
Use the calculator for planning only. Your brisket is done when it probes tender — not when the clock says so.
195–203°F is your guide, but probe feel is the final test. It should slide in like room-temperature butter.
Wrap at 165–170°F when bark is firmly set. Too early and the bark softens before it's ready.
A 2–4 hour insulated cooler rest is where the magic happens. Juices redistribute, the flat reaches its best texture.
Place brisket on a rack over a pan with 1–2 cups of broth or water. Keeps the oven humid and catches rendered fat.
The point and flat have different grain directions. Cut perpendicular to the fibers — the difference between tender and chewy.
Around 150–165°F, your brisket will stop rising in temperature — sometimes for hours. This is the stall: surface moisture evaporating counteracts the oven heat. It's completely normal. The solution is wrapping in foil, which eliminates evaporation and lets the temperature climb again.
| Stage | Internal temp | What to do |
|---|---|---|
| Start cooking | ~35–40°F | After tempering 60–90 min at room temperature |
| Stall begins | ~150°F | Keep cooking — don't raise oven temp |
| Wrap time | 165–170°F | Wrap tightly in heavy-duty foil when bark is firmly set |
| Done zone | 195–203°F | Probe test — should slide in with almost no resistance |
| Vent & seal for rest | ~203°F | Vent 15–20 min, rewrap tightly, transfer to cooler |
Don't chase an exact number. Some briskets are done at 195°F; others need 205°F. When the probe slides into the thickest part of the flat like room-temperature butter, it's done. That feel — not the thermometer reading — is the real signal.
Wrap when the bark is dark, firm to the touch, and not sticky — typically around 165–170°F. A bark that isn't fully set will turn soft and mushy once wrapped. Wrapping too early is one of the most common oven brisket mistakes. Use heavy-duty aluminum foil, two layers minimum, with the meaty side down. Seal the edges well and return to the rack at the same oven temperature.
Wireless thermometer tip: A fully sealed foil wrap can block the wireless signal of a MEATER probe. Leave a small opening where the probe exits the foil — minimal impact on the cook, and your temperature readings stay continuous throughout. See my thermometer recommendation →
Once wrapped, you'll typically see the internal temperature begin rising again within 30–60 minutes. Continue until probe-tender (195–203°F+). Don't be surprised if the brisket finishes well ahead of your estimated time — that's the wrap doing its job efficiently.
A long, hot hold in a cooler is one of the most reliable paths to exceptional brisket — and the most frequently skipped step by home cooks. During cooking, muscle fibers contract and squeeze moisture inward. When you remove the brisket, those fibers slowly relax and reabsorb the juices. Slicing immediately means all of that juice ends up on your cutting board. Waiting means it stays in the meat.
The cooler is your insurance policy. A brisket done three hours before guests arrive is not a problem — it's a gift. Slice as close to serving time as possible, and always slice against the grain. The point and flat have different grain directions — find each and cut perpendicular to the fibers.
Two pieces of equipment genuinely changed how I cook brisket. Everything else is standard kitchen gear.
A fully wireless meat probe that connects to your phone via Bluetooth or WiFi. Insert before the brisket goes in, leave it for the entire cook, and monitor temperature from anywhere.
A full packer brisket can be 18+ inches long. Standard roasting pans are too small — the brisket bends or hangs over the edges. An oversized pan with a rack makes a real difference.
Both produce excellent results, but they differ in time and character. 225°F is the classic method — roughly 1.5 hours per pound, producing deeply tender brisket. At 275°F, the rate drops to about 1.1 hours per pound with slightly firmer bark. For oven cooking where time is a factor, 275°F is generally the better choice — it's what I used with great results.
Use trimmed weight — the weight after removing excess hard fat. A packer brisket often has 2–4 lbs of fat that gets trimmed before cooking. If you haven't trimmed yet, your post-trim weight will typically be about 85–90% of the original. The rate-per-pound applies to actual meat, not fat cap.
This is a success, not a problem. A brisket holds safely in an insulated cooler for 4–6 hours with minimal quality loss — and often improves during the hold. Wrap it tightly in fresh foil, wrap that in a beach towel, and put it in your cooler. The residual heat continues working on the collagen the entire time.
A thermometer is strongly recommended — but probe feel is what matters most. Insert a toothpick or skewer into the thickest part of the flat. Significant resistance means it's not done. Almost no resistance — like going through room-temperature butter — means it's ready. Seriously though: get a MEATER. It makes the whole cook vastly less stressful.
Yes — add 1–2 cups of water or beef broth to the drip pan, not poured over the brisket. This creates steam in the oven environment and prevents the rendered fat from burning in the pan. The liquid doesn't touch the brisket — the rack keeps the meat elevated above it.
Brisket is naturally keto-friendly — it's essentially meat and fat, both of which fit perfectly in a ketogenic diet. This method uses no sugar, no BBQ sauce, and no carb-containing rubs. A dry rub of salt, pepper, garlic powder, and smoked paprika gives you a completely keto-compliant and deeply satisfying result. The high fat content and rich collagen make it one of the best cuts for a ketogenic way of eating.
Evelyne is a certified keto coach helping women over 40 lose weight, improve energy, and build a sustainable low-carb lifestyle. Book a free discovery call to see if it's the right fit.
Book your free call